Do you enjoy pulling out your credit card to pay for your monthly tennis club fees?
Does NO sound about right?
Tennis isn’t the cheapest sport out there and monthly court fees can be outrageous. Every now and then I bet you consider the possibility of having a tennis court in your backyard.
There’s no better way to keep ongoing costs down than to have a court in your own back yard. The thing is— a home tennis court can cost upwards of $65,000 — nobody is looking to pay for that.
Personally I can’t imagine going through the construction of a DIY tennis court, but if this type of project fits your personality, go for it.
Let’s break down the steps for a DIY tennis court. We’ll discuss costs, court surfaces, installation, and the work you’ll have to put in to make it happen!
Contents
What do You Need for Your Own Tennis Court?
A lot of patience, for starters.
You need a space that’s at least 120’ x 60’ wide that isn’t going to make a mess of your current lawn or yard.
A court that slopes will be frustrating. You’ll need to get your space as close to perfectly level as possible. At no point should a stationary tennis ball begin to roll in any direction, from any point on the court.
You need space and you need elbow grease. You’re going to need to allocate 7,200 square feet of space on your property to the tennis court.
Make sure that it isn’t eating up your entire yard and that it can be spaced apart from your home. You may need to put up protective netting to prevent a stray tennis ball from shattering the bathroom window!
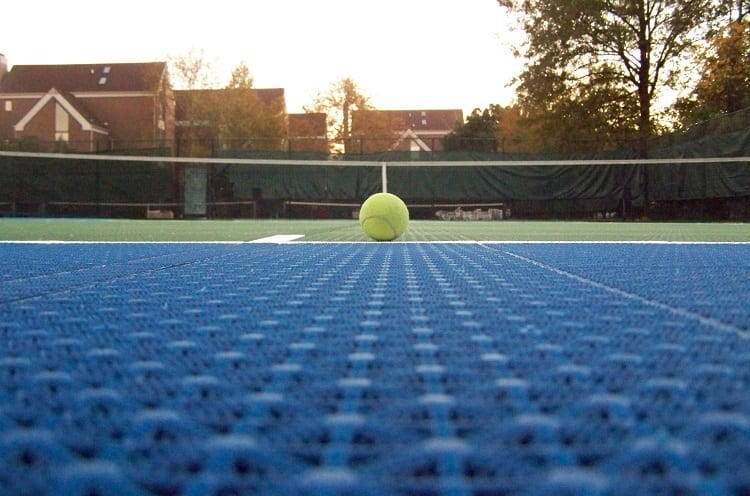
Which Surface is Best: Clay, Hard, or Grass?
The surface chosen is usually a combination of cost and preference.
If you’ve got bad knees, you’d generally prefer a softer surface so Clay or Grass would be best, but they require more ongoing maintenance.
Concrete / hard surfaces will require less maintenance once installed.
Let’s take a look at the main differences between each so you can formulate your own opinion. Then you can determine which DIY tennis court option is best for you, your style of play, and cost.
| Type | Asphalt | Hard | Clay | Grass |
| Cost | This isn’t something you can lay yourself unless you’re extremely knowledgeable of what you’re doing. It’s an expensive option due to the equipment needed for installation. For a professional installation, expect to pay $30,000 – $40,000. For a DIY installation, costs will be in the $4,600 to $8,300 range. |
If you buy your own concrete bags and mix it yourself, it’s labor-intensive but much less expensive than a professional installation. You might be able to install your court for $5,500 – $8,000. A professional installation will cost 8-10x as much. |
Clay can be purchased in brick form which makes it easier for a DIY installation. These bricks can range anywhere from $0.85 per piece to $15.00 each. The ballpark estimate here is $2,500 – $5,500 for the entire court. | Most backyards are grass. Unless you have to level out the space, cost isn’t a factor in acquiring the surface with a grass court. The cost comes into play with the maintenance. |
| Bounce | Similar to concrete, you get a consistent bounce. Asphalt has a little more shock absorption than concrete. Asphalt will also get a lot hotter than concrete in the summer so that might make it less comfortable for practicing. | Excellent bounce. The second fastest of all court surfaces (after grass). Concrete is the most commonly found court surface in residential settings as the materials are more easily acquired and DIY installation can occur with the least equipment. |
Clay courts are known for being the slowest court surface. The material slows down the ball as it hits the ground and balls don’t bounce up as high. While also slowing down the ball, your body doesn’t take as much of a beating running around on a softer surface. |
There’s basically no bounce. The dirt has a very high shock absorption rating. A tennis ball tends to skid on a grass court rather than bounce up. Due to potential imperfections in the ‘lawn’, the bounce isn’t as consistent as you’d find on a hard court. |
| Maintenance | Just like hard courts, asphalt is very easy to maintain. Asphalt is generally laid thinner than concrete so in extreme conditions, it’s more likely to expand or contract which may lead to cracks – which aren’t fantastic for tennis courts. | Very low maintenance. You might have to put a new seal on this once a year if you’re in very cold or very hot environments. For extreme temperatures, consider applying inlaid steel rods to the concrete for expansion purposes. | Clay maintenance is daily and ongoing. Courts must be brushed and watered daily to maintain their integrity. New clay must be added periodically as it erodes with playing and wind. |
Maintenance on these can be annoying and time-consuming. In order to play well, grass courts must be well-manicured. The biggest expense comes from watering and mowing to keep the surface at the right height. |
| Installation | Asphalt is by far the most difficult and court surface for a DIY install. Most people don’t have a steamroller in their garage for this particular weekend project. | Laying concrete is a process. If you’re not familiar with it, starting out with a project the size of a tennis court likely isn’t a good idea. | If you use pavers or clay bricks, installation won’t be too difficult. The materials aren’t too costly, but you must be meticulous as you install the pavers. Slow and steady wins this race! | If your backyard is level and already all grass, installation is pretty much taken care of. It’s the maintenance aspects that might make you question having a grass court. |
How to Prepare The Area
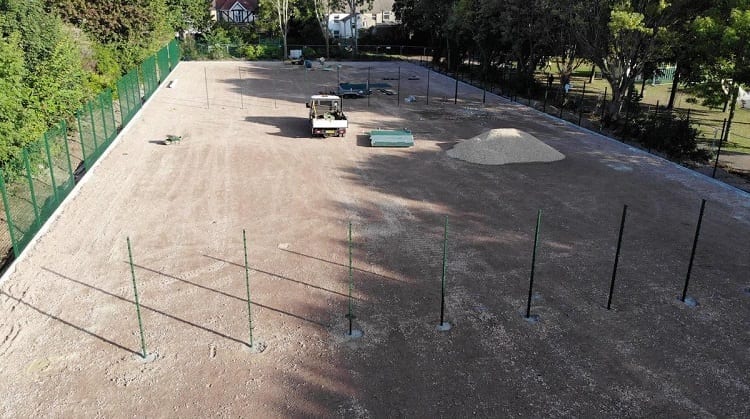
First thing’s first: find a very good spot.
Consider keeping it at least 10-20 ft away from your home.
Measure out 120’ x 60’ as that’s the amount of space recommended so you’ll have more than enough room for the court and surrounding areas.
That’s what you’re going to pave with the understanding that the playable court space will not be the same size.
Remove what’s in your way. Whether that means mowing the lawn and ripping up grass, tree stumps, etc. – remove it all.
Next you’re going to want to get a steamroller. Yeah, renting a steamroller may seem like a bit much, but in order to flatten the area, you’ll need it. If you decided to go with asphalt you’ll definitely need it.
How to Draw Your Lines
While we discussed the average size of a court being 120’ x 60’, that is the total amount of space including the outer areas of the paved space.
For an asphalt or concrete surface, you’ll need to paint the court surface.
Here’s a good anti-slip paint option that comes in multiple colors. Green is usually most popular, but that’s the thing about a home tennis court – you’re in charge so you can pick whatever color you want!
Rather than buy in one gallon containers, here’s an option that comes in 5 gallons and is therefore more cost effective.
The actual court lines are 78’ by 36’—that gives you some leeway if you have quite 120′ x 60′ of available space.
To get your lines just right, install the net first by measuring at the 39 ft mark in the center of the court.
The doubles alley should be 39 feet by 4.5 feet.
The doubles sideline should be 78 feet long.
Within the court “No Man’s Land” spots should be 18 feet by 27 feet.
Each ad court and deuce box should be 21 feet by 13.5 feet.
Options for lines are painting them onto the surface or installing tape.
Paint is less expensive, but more installation intensive.
Tape is a little more expensive, but less intensive to install as the width of the lines is consistent which reduces human error.
Installing the Net
Installing the net might feel like its own DIY project!
It involves installing the two outside posts, interior pipe anchor, and then connecting the net to those pieces.
The folks at Do It Tennis have very clear step-by-step instructions on what to do.
Take their advice and your net will be up in no time.
A net can be expensive. Check out this option for a more cost effective net.
What is the Average Cost of DIY Tennis Courts?

It depends on the materials, but considering the average DIY tennis court is made out of concrete, we’ll use that as our baseline (wink!).
Assuming that you can lay the concrete by yourself, you still need to get the right material to paint the lines.
Considering you will be doing most of the work, you can expect a concrete court with a net and proper line application will run you around $7,400 – $9,300.
Get yourself some takeout and a six-pack while you do this project because while the end result is going to be great, it may be a rather aggravating journey.
With a DIY tennis court being the primary goal, there are still some other things to consider that will increase overall costs:
- Lighting – This is personal preference. If you only plan on playing during the day, lighting won’t be necessary. If you want more flexibility or just want to ensure that nobody gets hurt in the court area, lighting the area is something to consider.
- Fencing – Chasing after tennis balls isn’t fun. In addition to that, there can be liability issues if a wide area like a tennis court isn’t fenced in. Check with your insurance company about any potential fencing requirements.
- Windscreens – To keep the wind from wrecking havoc on your serves and touch shots, windscreens to the rescue! There are multiple options available on the market. Here are a two suggestions of different types of windscreen: option one or option two.
- Squeegee – Rain happens. Puddles happen too. No matter how level you think you installed your court, over time there will be spots where the court dips and water pools. To quickly remove some of the moisture from the surface, a squeegee will be a useful tool. When it wears out, replacement rollers are easily acquired.
There are definitely other items that can add to your total cost for having a court on your own property. Take it all into consideration when determining if it’s the route you want to take.
Your Court, Your Rules
Are you ready to look outside your home and see YOUR tennis court?
There are definitely benefits to having one right outside your door.
You can host friendly tournaments, practice alone or with a ball machine, and there’s nobody there to take the court away from you when your time is up.
Clubs can be fun and social. If tennis is your primary social activity, keep going to the club. If you’re very serious about tennis or have a junior who is about to make their mark, consider a court at home.
As I said, a DIY tennis court project is well beyond MY skills. But if it’s within your wheelhouse, I think it’s worth considering.
Between this DIY write up and all the other posts about tennis equipment you might need, we’ve got a guide on just about everything.
After a little more reading get out there to practice your serve!